Passer au contenu du produit
1 sur 3

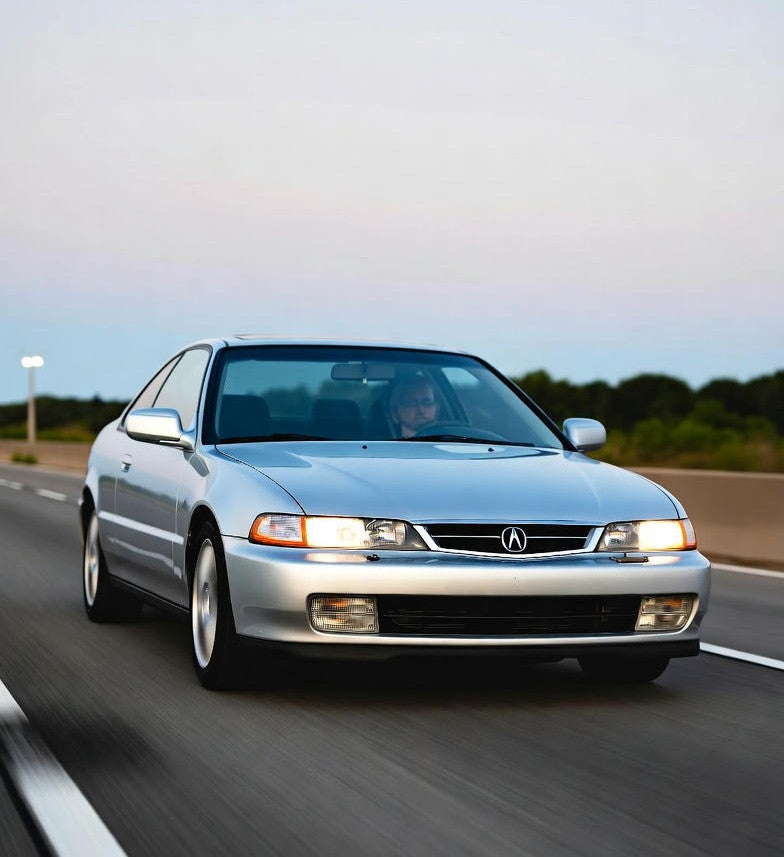
Admission d'air froid pour Acura CL Modèle de base (1997-1999) Moteur 3.0L


Prix normal $89.99
Prix promotionnel $89.99 Prix normal
Livraison calculée au moment du paiement.

  • Ajustement garanti
  • Approuvé par des milliers de personnes
  • Garantie à vie

Vous le voulez bientôt ? Commandez dès maintenant !

I18n Error: Missing interpolation value "end_date" for "Se termine le {{ end_date }}"

Libérez la puissance du V6 : Admission d'air froid pour Honda Accord et Acura CL

Votre V6 est conçu pour la performance. Libérez-le. Les moteurs V6 2,7 L et 3,0 L des Honda Accord et Acura CL sont réputés pour leur douceur de fonctionnement, mais la boîte à air d'origine, trop restrictive, bride leur plein potentiel. Notre système d'admission d'air froid haut de gamme remplace ce goulot d'étranglement par une tuyauterie légère en aluminium T304. Résultat : un gain substantiel de puissance et de couple (jusqu'à 10 %) , une réponse à l'accélérateur plus vive et une sonorité moteur profonde et racée qui transforme vos trajets quotidiens en une expérience de conduite sportive.


Pourquoi améliorer votre système d'admission d'air ?

  • Gains de puissance considérables : Conçu pour offrir un gain de performance allant jusqu’à 10 % en puissance et en couple en maximisant le flux d’air à travers le collecteur d’origine.
  • Réponse instantanée à l'accélérateur : fini les à-coups. En optimisant le flux d'air, cette admission garantit une réactivité immédiate du moteur dès que vous appuyez sur l'accélérateur, pour une conduite plus efficiente.
  • Sonorité profonde et sportive : Dites adieu au silence. Ce kit amplifie le grondement de l’admission du V6, créant une sonorité grave et rauque absolument incroyable lors des fortes accélérations.
  • Construction haut de gamme : Fabriqué en aluminium T304 léger pour une résistance à la chaleur supérieure, une durabilité accrue et un aspect soigné et personnalisé sous le capot.
  • Économique : Comprend un filtre à air lavable haute performance. En conditions de conduite normales, il ne nécessite un nettoyage que tous les 80 000 km, ce qui vous permet de réaliser des économies sur les filtres jetables.
  • Sans risque pour la garantie : Cette mise à niveau est conçue pour améliorer les performances sans annuler la garantie constructeur de votre véhicule.

Compatibilité avec le véhicule

Ce système est conçu sur mesure pour les applications V6 suivantes (compatible avec les transmissions automatiques et manuelles) :

  • Honda Accord (LX / EX / EX-R) 1995-1997
    Moteur : V6 de 2,7 L
  • 1998 – 2002 Honda Accord (LX/EX)
    Moteur : V6 3,0 L
  • 1997 – 1999 Acura CL (Coupé de base 2 portes)
    Moteur : V6 3,0 L

Installation rapide et facile

Durée requise : moins de 60 minutes.
Ce kit remplace directement votre filtre à air et votre conduit d'admission d'origine. L'installation est simple et ne nécessite que des outils à main de base (tournevis et clés à douille).

Conseil de pro : Nous vous recommandons de réinitialiser les bornes de votre batterie pendant quelques secondes lors de l’installation. Cela permet au calculateur moteur (ECU) de « réapprendre » les paramètres de débit d’air accrus, vous assurant ainsi un gain de performance maximal immédiat.

Améliorez dès aujourd'hui les performances et le son de votre V6.


Cote de sécurité du moteur
Difficulté


Ajustement

Faire

Acura

Cylindrée

  • 3,0 L

Année

  • 1997
  • 1998
  • 1999

Installation

The Wrench Time

  • Estimated Time: 60-90 Minutes
  • Difficulty: 4/10 - Standard J30 wrenching, but removing the factory fender resonator requires peeling back the splash guard and battling old plastic clips.

Tools You Will Need

  • 10mm and 12mm sockets (3/8" drive with a 6-inch extension)
  • 8mm nut driver or flathead screwdriver (for hose clamps)
  • Panel popper tool (critical for Honda/Acura push-clips)
  • Needle-nose pliers (for factory spring clamps)
  • Silicone spray or soapy water (for sensor transfer)
Mechanic’s Pro Tip (The "Gotcha"):
The 1G CL community universally hates the brittle plastics on this chassis. The rubber grommet holding the IAT (Intake Air Temperature) sensor into the factory J30 tube will be baked hard from decades of heat cycles. If you yank it, you will snap the fragile plastic sensor probe off in the tube. Hit the base with silicone spray and gently twist it out. Same goes for the fender liner clips—spray them before prying so they don’t shatter.

Phase 1: Removing the Factory Part from your 1997-1999 Acura CL 3.0L

  1. Disconnect the Battery: Always start by disconnecting the negative battery terminal using a 10mm wrench to prevent check engine lights.
  2. Disconnect Sensors & Lines: Locate the IAT sensor on the factory rubber intake hose. Depress the tab and unplug the harness. Next, use needle-nose pliers to compress the spring clamp on the PCV breather hose and pull the hose off the intake tube.
  3. Remove the Airbox & Tube: Loosen the throttle body clamp using an 8mm nut driver. Unbolt the upper and lower factory airbox housings using your 10mm socket. Pull the entire assembly out of the engine bay.
  4. Delete the Fender Resonator: Turn your steering wheel all the way to the right. Use your panel popper to carefully remove the front half of the driver-side inner fender liner. Grab your 10mm socket on a long extension and unbolt the factory plastic resonator box hidden inside the bumper cavity, then drop it out completely.

Phase 2: Installing the Cold Air Intake for Acura CL Base Model (1997-1999) 3.0L Engine

  1. Prep the Aftermarket Pipe: Insert the provided rubber grommet into the pre-drilled hole on the new intake pipe. Lubricate the inside of the grommet with a drop of soapy water or silicone spray, then carefully push your factory IAT sensor into place. Do not force it.
  2. Mount the Couplers: Slide the silicone reducer coupler onto the J-series throttle body. Secure the throttle body side with a T-bolt or worm gear clamp and tighten it down using your 8mm nut driver.
  3. Route the Cold Air Pipe: Carefully feed the lower section of the intake piping down through the factory hole into the fender well. Slide the upper end into the throttle body coupler. If the kit includes a vibration isolation mount, secure it to the factory chassis bracket using a 10mm wrench. Tighten all remaining pipe clamps.
  4. Install Filter & Vacuum Lines: From inside the wheel well, slide the new pod filter onto the end of the intake pipe and tighten the clamp with a flathead screwdriver. Reattach your inner fender liner clips. Back up top, route the supplied silicone breather hose from the engine valve cover to the nipple on the new intake tube. Reconnect the IAT sensor harness.
  5. ECU Relearn Procedure: Reconnect your negative battery terminal. Turn the key and start the engine. Do not touch the gas pedal for at least 20 seconds. Allow the J30 ECU to properly relearn its base idle targets with the increased, colder airflow. Check for any whistling or vacuum leaks around the couplers.

Disclaimer: This is a general guide provided for the 1997-1999 Acura CL 3.0L. Always refer to your factory service manual for exact torque specifications and safety procedures.

Garantie

Tous nos produits sont couverts par notre garantie à vie limitée . Nous garantissons leur qualité. [ Voir conditions ]

Admission d'air froid pour Acura CL Modèle de base (1997-1999) Moteur 3.0L

$89.99