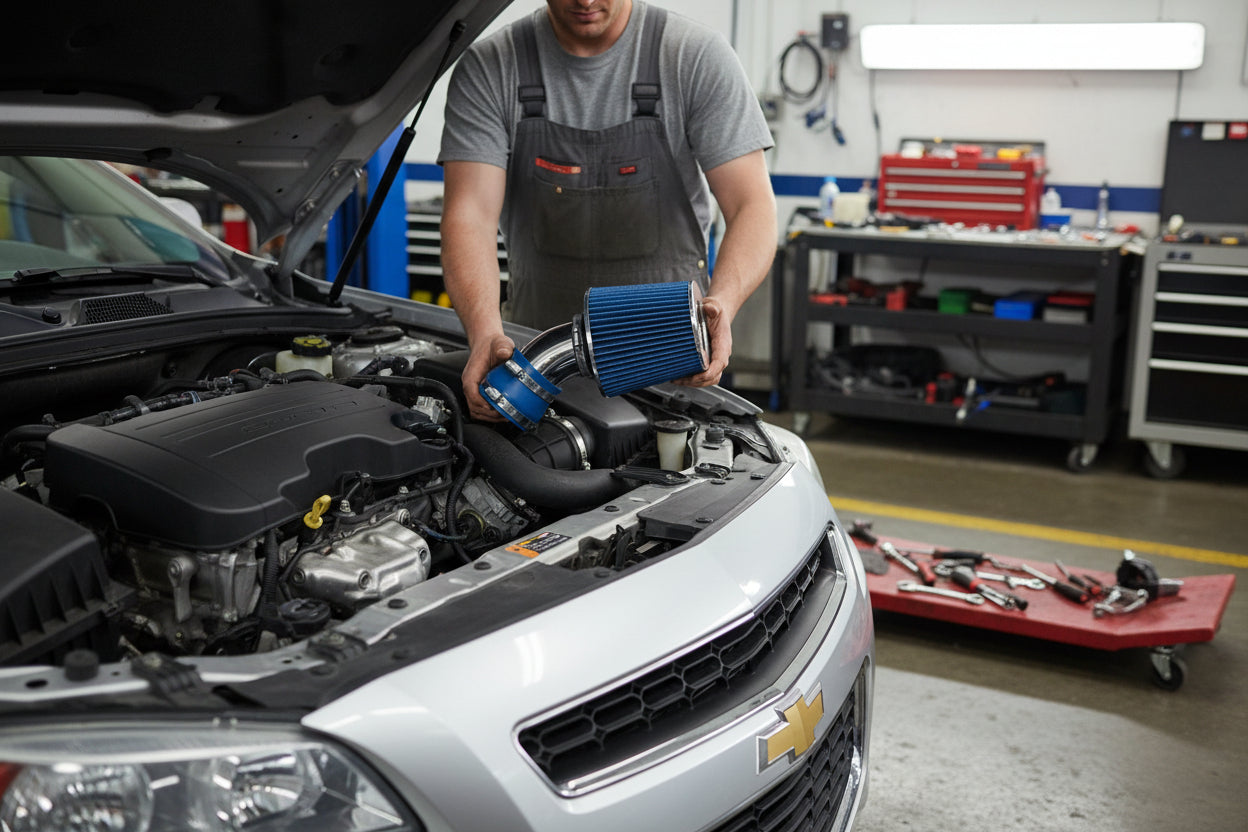
Cold Air Intake for Chevrolet Malibu (2004-2011) 3.5L 3.9L Engines - Blue
Couldn't load pickup availability
- Guaranteed Fitment
- Performance Tested
- Lifetime Warranty
Want it soon? Order within
Shop safely
Secure checkout with trusted payment providers.
2004-2011 Chevrolet Malibu | 3.5L & 3.9L V6
Transform your Malibu's performance with this premium cold air intake system. Engineered specifically for 3.5L and 3.9L V6 engines, this kit replaces your restrictive factory airbox to deliver cooler, denser air directly to your engine—unlocking hidden power and improving throttle response.
Why Upgrade?
Factory intake systems prioritize quiet operation over performance, creating airflow restrictions that limit your engine's potential. This cold air intake removes those barriers using precision-engineered aluminum piping, allowing your engine to breathe freely and perform at its best.
Performance Benefits
- 8-10% Power Increase – Noticeable gains in horsepower and torque
- Improved Throttle Response – Instant acceleration when you press the pedal
- Better Fuel Efficiency – Optimized air-to-fuel ratio for more efficient combustion
- Aggressive Sound – Deep intake growl during acceleration
- Show-Quality Appearance – Chrome-polished aluminum with blue filter accents
Premium Build Quality
- T-304 Aluminum Piping – Lightweight, durable, and corrosion-resistant with chrome polish finish
- High-Flow Air Filter – Washable and reusable performance filter in vibrant blue
- Complete Hardware Kit – Includes all couplers, clamps, and mounting hardware
- Direct Bolt-On Installation – Uses factory mounting points, no modifications required
Vehicle Compatibility
2004-2011 Chevrolet Malibu
Fits all trim levels with 3.5L or 3.9L V6 engines
Specifications
| Engine: | 3.5L V6 / 3.9L V6 |
| System Type: | Cold Air Induction |
| Tube Material: | T-304 Aluminum (Chrome Polished) |
| Filter: | High-Flow, Washable & Reusable (Blue) |
| Installation: | Direct Bolt-On |
What's in the Box
- Chrome-polished aluminum intake pipe
- Blue high-flow performance air filter
- Silicone couplers and stainless steel clamps
- Complete mounting hardware
- Installation instructions
Important Installation Note
⚠️ Before Installation:
- Ensure engine is completely cool
- Disconnect the negative battery cable
- Wait at least 1 minute after installation before reconnecting battery
- This allows your ECU to reset and learn the new airflow characteristics
Fitment
Fitment
|
Make |
Chevrolet |
|---|---|
|
Engine Size |
|
|
Year |
|
Installation & Tools
The Wrench Time
- Estimated Time: 45-60 Minutes
- Difficulty: 2/10 - Straightforward driveway bolt-on, but you’ll need a delicate hand when transferring the sensitive mass airflow sensor and dealing with heat-baked Epsilon platform plastics.
Tools You Will Need
- 10mm socket and ratchet (for battery and factory mounting bolts)
- 8mm socket or flathead screwdriver (for hose clamps)
- T20 Torx bit (for the factory MAF sensor screws)
- Panel popper tool (for wire harness retaining clips)
- MAF Sensor Cleaner (Highly recommended while it’s apart)
On these 3.5L and 3.9L "High Value" V6 engines, the factory plastic PCV fresh air tube that routes from the valve cover to the intake resonator is notoriously brittle from years of heat cycling. If you yank it, it WILL snap. Wiggle it gently while fully depressing the grey retaining ring to free it. Additionally, the factory MAF sensor screws thread directly into plastic—do not use power tools to remove or install them, or you will strip the housing.
Phase 1: Removing the Factory Intake on your 2004-2011 Chevrolet Malibu 3.5L 3.9L
- Disconnect the Battery: Always start by disconnecting the negative battery terminal using a 10mm wrench to prevent check engine lights and protect the ECU.
- Unplug the MAF Sensor: Locate the Mass Airflow (MAF) sensor on the factory intake tube. Slide the red locking tab back, press the release clip, and disconnect the harness. Use a panel popper to carefully pry the wire harness retaining clips out of the factory plastic airbox so the wire hangs free.
- Disconnect the PCV Breather: Carefully disengage the brittle PCV breather tube from the factory intake resonator. Depress the locking tab and wiggle it free without forcing it to prevent snapping the connector.
- Loosen the Throttle Body Clamp: Use an 8mm socket to loosen the hose clamp securing the factory rubber intake accordion tube to the throttle body.
- Extract the Factory Airbox: Remove the main retaining bolt securing the airbox to the inner fender well using a 10mm socket. Grab the entire airbox assembly and pull firmly upward to pop it out of the lower rubber mounting grommets. Pull the assembly out of the engine bay.
Phase 2: Installing the Cold Air Intake - Blue
- Transfer the MAF Sensor: Using your T20 Torx bit, carefully remove the two screws holding the factory MAF sensor in the OEM housing. Gently pull the sensor straight out to avoid damaging the exposed hot-wire element. Transfer it into the new blue intake tube using the supplied aftermarket hardware. Tighten by hand using a standard screwdriver—do not overtighten!
- Install the Throttle Body Coupler: Slide the provided silicone reducer coupler onto the throttle body. Secure the inner clamp over the throttle body using your 8mm socket, but leave the outer clamp loose for now to allow for adjustment.
- Mount the New Intake Tube: Slide the blue Cold Air Intake tube into the throttle body coupler. Align the welded bracket on the tube with the factory fender well mounting point. Insert the supplied bolt and tighten loosely with a 10mm socket.
- Attach the Filter and Connections: Install the blue conical high-flow air filter onto the end of the intake tube and tighten the clamp firmly with your 8mm socket. Reconnect the factory PCV breather hose to the welded nipple on the new tube, then plug your MAF sensor harness back in and engage the red locking tab. Finally, go back and fully tighten the throttle body clamp and the fender mounting bolt.
- Perform the Relearn Procedure: Reconnect the negative battery terminal with your 10mm wrench. Start the engine, but do not touch the gas pedal for 20 seconds. Let it idle untouched so the ECU can properly adjust to the increased airflow parameters of your 2004-2011 Chevrolet Malibu 3.5L 3.9L.
Disclaimer: This is a general guide provided for the 2004-2011 Chevrolet Malibu 3.5L 3.9L. Always refer to your factory service manual for exact torque specifications and safety procedures.
Warranty
Warranty
All products are backed by our Limited Lifetime Warranty. We stand by our quality. [See terms]

Shopping Safely
At our Shopify store, we prioritize your safety and security. Here's how we ensure a secure shopping experience:
1. Secure Transactions: We use advanced encryption to protect your personal and payment information, ensuring it is safely transmitted and safeguarded.
2. Trusted Payment Gateways: Our store integrates with trusted payment gateways, ensuring your transactions are processed securely and efficiently.
3. Data Privacy: Your privacy is our top priority. We follow strict data protection policies to keep your personal information confidential and secure.
4. Secure Platform: Shopify provides robust security features and continuous monitoring against vulnerabilities, ensuring a safe shopping environment.
5. Verified Merchants: We are a verified merchant on Shopify, committed to providing authentic and high-quality products.
6. Transparent Policies: Our clear return, refund, and shipping policies provide peace of mind, knowing we stand behind our products.
7. Customer Support: Our dedicated customer support team is ready to assist with any concerns or questions you may have.
Shop confidently at our Shopify store, where your safety and satisfaction are our top priorities.
$80.99